Install a Japan eSIM before departure when the exact product allows it, but do not confuse installation with activation or with the start of paid validity. Those are three different clocks. Airalo says most of its eSIMs start validity only when they connect to a supported network in the coverage area, but some start at installation. Saily’s current Japan plans activate automatically on arrival when the eSIM and roaming are enabled, while purchased plans also have a 30-day activation window. Klook listing 109393 currently says its data and validity begin when the installed eSIM connects to the overseas network.
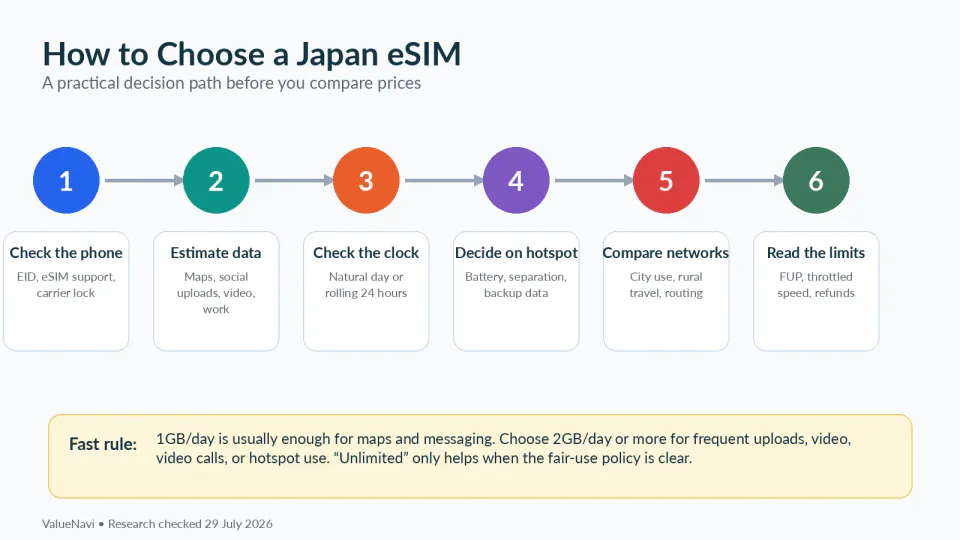
The safest workflow is therefore: check the phone → read the exact validity trigger → install on stable Wi-Fi → save recovery information elsewhere → connect and test only when the product should start.
The three clocks: installation, activation and validity
↔ Scroll table left or right
Clock | What it means | Why travellers confuse it |
Installation | The eSIM profile is added to the phone | Some screens use words such as “activate” while adding the profile even though paid validity has not started |
Network activation | The line registers on a supported mobile network | This is the trigger for many travel eSIMs, but not all |
Paid validity | The purchased 7/15/30-day period begins | Its trigger depends on the exact SKU, not on the general idea of an eSIM |
Never copy the timing rule from a different provider or even a different package from the same provider. Airalo’s own help says most packages begin at first supported-network connection, while some begin at installation. Check the package’s Validity Policy before scanning anything.
Provider examples: the same installation action can have different consequences
Airalo: the current Moshi Moshi 20GB / 30-day Japan product says validity begins when the eSIM connects to a mobile network in the coverage area. Airalo’s general help also warns that some other products can begin at installation. Advance installation is therefore often safe, but the exact package controls.
Saily: the current Japan page says the plan activates automatically when you arrive, provided the Saily eSIM is enabled and roaming is on. It also states that all plans have a 30-day activation period; if a purchased plan is not activated within that window, it is automatically activated. That means “buy two months early and leave it untouched” is not a neutral choice.
Klook listing 109393: the current setup instructions say you can add the eSIM before the trip and that data/validity begin when it connects to the overseas network. This is a listing-level rule, not proof that every Klook eSIM behaves identically.
The decision is not which rule is “best.” It is whether the rule matches when you intend to buy, install and first connect.
Before buying: prove that the phone is eligible
On iPhone, Apple currently says a travel eSIM from another provider requires an unlocked device. Under Settings → General → About, an unlocked iPhone shows No SIM Restrictions next to Carrier Lock.
Do not rely on the presence of an EID alone. The exact model, market variant, carrier lock and work-device management can all matter. Confirm the device before choosing a non-refundable or single-install product.
Use the Japan eSIM phone compatibility checklist before payment if the model or region is uncertain.
When I would install before flying
I would install before departure when all four conditions are true:
the provider explicitly allows advance installation;
the validity policy does not start simply from installation;
you have stable Wi-Fi and enough time to recover from a setup error;
the QR/manual installation details are saved somewhere other than the destination phone.
This is better than first attempting installation after baggage claim because the airport is the worst place to discover a carrier lock, a QR problem or an inaccessible provider account.
Airalo itself recommends buying and installing in advance when the package permits it because installation requires a stable internet connection.
When I would wait
Wait when the package’s validity begins at installation, when a provider imposes a purchase-to-use deadline that could expire before the trip, or when you are still deciding which phone will carry the plan.
The key red-team question is: what do I lose if I install today? If the answer is “nothing, because validity starts on first Japanese network connection,” advance installation is usually efficient. If the answer is “paid days start now,” waiting is essential.
Save the recovery bundle outside the phone
Before leaving home, save:
order number and exact package name;
QR code or manual SM-DP+ details if the provider permits you to retain them;
APN and roaming instructions;
supported network names;
activation/validity wording;
support contact and login method;
the first hotel address and route offline.
Store the bundle on a laptop, travel partner’s phone or secure cloud account—not only on the handset that may be offline.
Do not treat the QR image as a guaranteed spare key. Many eSIM profiles are single-install or have restricted reinstallation. Deleting a working profile can turn a settings problem into a replacement-profile problem.
The “Activating” screen before Japan is not always a failure
Airalo currently notes that an iPhone can show an eSIM as “activating” or even “activation failure” when the profile has been installed before reaching the destination network. In that case, the installation may already be complete and network activation can finish after arrival.
This is exactly why travellers should separate the three clocks. A phone screen using the word “activation” does not necessarily mean your paid Japan validity has started or that the profile is broken.
Do not repeatedly delete and re-add the profile because the status looks alarming. Check the provider’s instructions first.
The 24-hour pre-flight check
One day before departure:
Confirm the travel eSIM profile is visible on the intended device.
Rename it clearly—for example “Japan Data”—so it is not confused with the home line.
Re-read the validity trigger from the actual order.
Confirm the provider account can be opened without depending on an SMS that may be difficult abroad.
Download the first hotel route and critical ticket confirmations.
Keep the home SIM’s mobile-data roaming off unless you deliberately want paid home-carrier roaming.
If two people intend to share one hotspot, decide the host phone before departure and use the two-person hotspot decision guide.
Arrival: prove the line works before leaving airport Wi-Fi
After landing, keep airport Wi-Fi available while you test the mobile line:
Enable the Japan eSIM.
Select it as the mobile-data line.
Enable data roaming only if the provider requires it.
Apply the exact APN instructions if necessary.
Turn Wi-Fi off briefly and load a simple page plus the hotel route.
Send one message.
If hotspot matters, connect the second device for a short test.
A speed test is not the priority. You are proving that the functions needed for the transfer—navigation, messaging and account access—work before the airport Wi-Fi safety net disappears.
Late arrival: do not delay activation just to save pennies if live data is operationally important
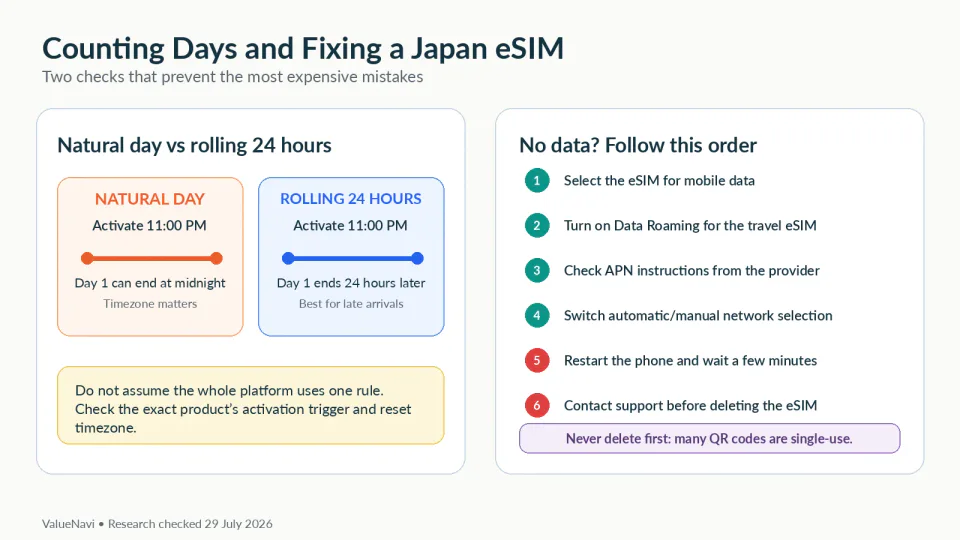
If you land close to midnight, a validity rule can make waiting attractive. But the transfer may need a last train, taxi app, hotel message or live navigation.
The late-arrival validity guide separates natural-day and rolling-24-hour logic. Use it before deciding whether to connect at 23:40 or wait until after midnight.
The cheapest validity outcome is not automatically the safest arrival plan.
If it does not work, change one variable at a time
Before deleting anything, check:
travel line enabled;
travel line selected for mobile data;
roaming according to provider instructions;
APN;
plan activation status;
remaining data;
supported/manual network selection.
Save screenshots before changing multiple settings. If support later reviews an activation or refund issue, a timeline is more useful than “it never worked.”
Use the Japan eSIM troubleshooting guide before deleting the profile.
Final decision
Install before the trip when the package explicitly allows advance installation and validity starts later, because stable home Wi-Fi gives you a better recovery environment.
Wait when installation itself starts validity or when a purchase-to-activation deadline could expire before travel.
Never treat “installed”, “activated” and “validity started” as synonyms. Read those three events separately on the exact product. That distinction prevents both common mistakes: wasting paid days by starting too early and arriving in Japan with an untested profile that could have been fixed at home.
References
Apple — use eSIM while travelling internationally · Airalo — advance installation · Airalo — validity policies · Saily — Japan activation terms · Klook — Japan eSIM listing 109393. Checked August 25, 2026. Installation and validity triggers can vary by exact package.